A Simple Display
by Tim Robinson
Reprinted from "Crown Jewels of the Wire", May 1987, page 12
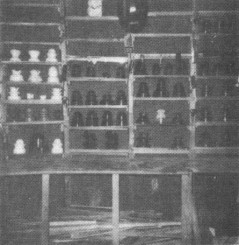
I am the first to admit that these shelves are terribly basic and not
glamorous, yet they are practical and offer visibility to a collection.
The shelves involve utilizing the space between the wall studs in a utility
room, garage or basement. Studs are usually 14" to 15" apart and 3-1/2"
deep -- perfect for an insulator. I scrounged scrap wood from building
sites. All that is needed is preferably wooden shingles for the shelves (they're
thin and easy to cut), and 1/2" x 1/2" wooden strips from which to cut
sections to support the shelves between the studs.
Simply mark the locations for the shelves vertically on each of the two
studs. My shelves average 5-1/2" vertically. My studs are 3-1/2" deep.
Cut 3-1/2" sections from the wooden strips, and nail them at a slight angle
downward toward the back, on each of the two studs. Then cut your shelves from
the shingles, 3-1/2" deep by the width of the inside of the studs. My
shelves average 14" or 15" in width. Nail the shelves to the studs,
supported on the wooden strips and you'll instantly have display shelves which
tilt downward at the back so that the insulators cannot slip forward and fall.
In a 8' wide by 3-1/2' high area on one wall, I have six sections with 8
shelves per section -- 48 shelves. Each shelf holds 3-5 insulators depending on
size. An average of 3.5 insulators per shelf allows 168 insulators to be
displayed in this small area.
If there are collectors out there with insulators wrapped in newspaper and in
boxes with no way to display, why not try this economical way to display your
"jewels?"
| 
)